Not many services can enjoy the reputation on the level of Cypress and I've always known it's not all talk. Unfortunately, even though writing tests in it was nothing but a joy every time I tried it out, I felt like it is above my head to try to include it in an actual CI/CD pipeline. Now, I am happy to report that this assumption was just that - an assumption, wrong one at that. GitHub Actions enables building an E2E testing pipeline at no cost*: nor time, nor financial.
In the next couple of paragraphs, thanks to the wonderful combination of Cypress and GitHub Actions, we will set up a basic CI/CD that will be capable of running our E2E tests on different devices and operating systems, intercepting requests on their way to the API and returning a video of the actual interactions if the test run has failed.
Agenda
- Setting up a basic Next.js application
- Creating an endpoint in Next.js
- Adding Cypress and writing a test
- Integrating Cypress into GitHub
- Running Cypress via GitHub Actions
Useful links
1. Setting up a basic Next.js application
For the purpose of this article, I built a simple Next.js application containing a form with asynchronous logic. I chose Next.js purely out of my convenience, Cypress is completely agnostic of the front-end technology you use and you can point it to run tests on any existing website. Anyway, our main point of focus is a file Form.js that looks like this:
// src/components/Form.js

import React from 'react'
import styles from '../../styles/Home.module.css'

// our request to a Next.js endpoint
const sendForm = () =>
  fetch('/api/ping', {
    method: 'POST',
  })

const Form = () => {
  const [loading, setLoading] = React.useState(false)
  const [error, setError] = React.useState(null)
  const [data, setData] = React.useState(false)

  const submitHandler = async (e) => {
    e.preventDefault()
    setData(false)
    setLoading(true)
    try {
      const response = await sendForm()
      await response.json()
      setData(true)
      setLoading(false)
      setError(null)
    } catch (error) {
      setData(false)
      setLoading(false)
      setError(error)
    }
  }

  return (
    <form className={styles.form} onSubmit={submitHandler}>
      <label>
        First Name
        <input type="text" name="first_name" />
      </label>
      <label>
        Last Name
        <input type="text" name="last_name" />
      </label>
      <button type="submit">Submit</button>
      {loading && <h2>Loading...</h2>}
      {error && <h2>Error :(</h2>}
      {data && <h2>Success!</h2>}
    </form>
  )
}

export default Form
The use-case is very simple: the user fills all the fields, clicks submit, waits for the response from quite a slow server, and enjoys a big ugly heading "Success!".
2. Creating an endpoint in Next.js
In order to be as close to a real-world scenario, we will not mock our request like savages but rather use a native Next.js feature called API Routes to build an actual (although very simple) endpoint:
// pages/api/ping.js

export default (req, res) => {
  setTimeout(() => {
    res.status(200).json({})
  }, 3000);
}
All this endpoint does is returning the status 200 after wasting 3 seconds of our lives. Fortunately, this is all we need to start testing our application.
3. Adding Cypress and writing a test
Now things are about to get spicy. We are adding a dependency that is an absolute star of today's show: Cypress.
yarn add cypress --dev

// or

npm install cypress --save-dev
The people behind Cypress call it "a next-generation front-end testing tool built for the modern web" but I would rather describe it as "the only tool that can ever make you excited about testing 😎". E2E tests by definition are much closer to simulating the actual user experience, therefore they are much more pleasant to write (because you are not diving into the implementation details) but Cypress takes it to another level.
Cypress has excellent documentation with tons of examples out of which I especially recommend you take a look at this one called Kitchen Sink because it contains just about every scenario you may encounter in your application. Unfortunately, today's article will not necessarily focus on the power of Cypress in terms of writing assertions and simulating user interactions, but rather the ease of setting everything up in a configuration that can be useful in production-grade applications.
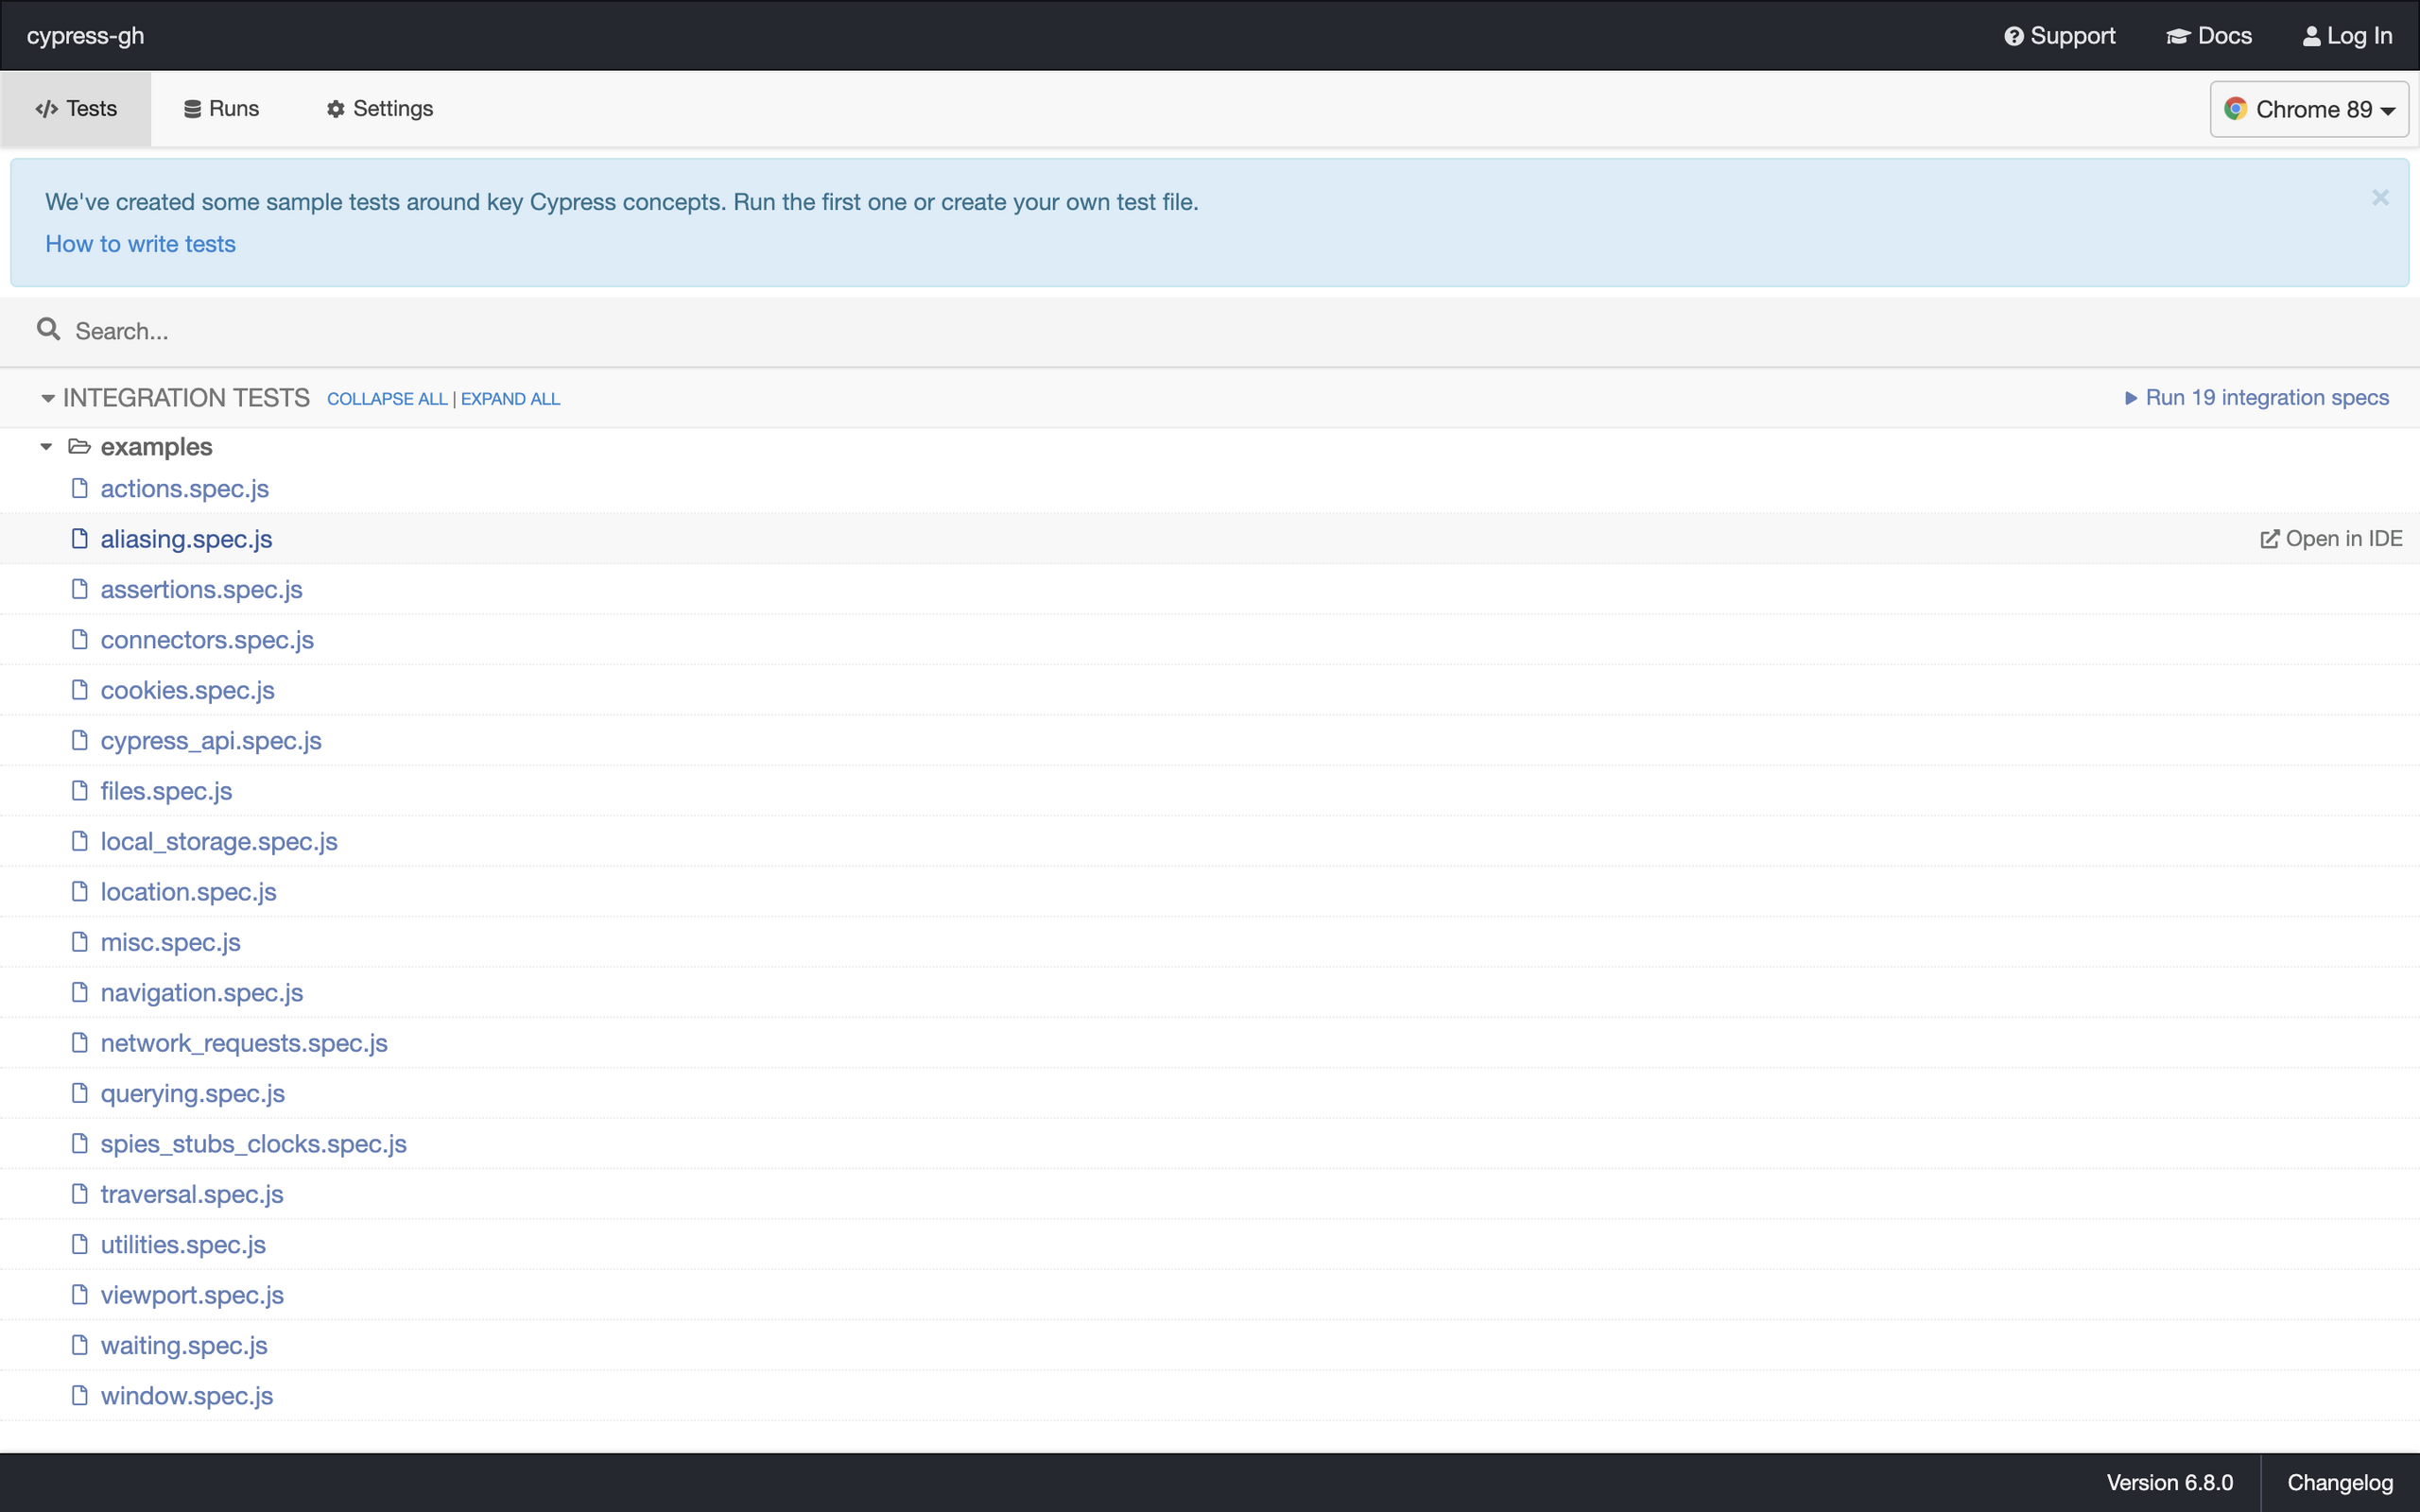
First time you run Cypress through yarn/npm run cypress open it will generate a basic folder structure with a bunch of files and I suggest you don't cross them out right away because, f.e., the examples provided in cypress/integration/examples can be quite useful.
Cypress comes in with a very handy GUI that lets us browse and manage all of our tests.
It will prove its worth once we finally write our first test:
// cypress/integration/form.spec.js

describe('The form', () => {
  it('shows success message when submitted correctly', () => {
		cy.visit("http://localhost:3000");
    cy.get('[name="first_name"]').type("Adrian");
    cy.get('[name="last_name"]').type("Pilarczyk");
    cy.get('[type="submit"').click();
    cy.get('form').should('contain', 'Success!')
  });
});
Let's break down what's going on here:
// cypress/integration/form.spec.js

// the name of the test suite
describe('The form', () => {
	// the description of the individual test
  it('shows success message when submitted correctly', () => {
		// command: tell Cypress to visit this address
		cy.visit("http://localhost:3000");

		// command: select an element of name === "first_name"
    cy.get('[name="first_name"]')
			.type("Adrian"); /* <- command: type a string into it */

		// repeat the above
    cy.get('[name="last_name"]').type("Pilarczyk");

		// command: find an element of a type === "submit" and click it
    cy.get('[type="submit"').click();

		// command: find a form element
    cy.get('form')
			.should('contain', 'Success!') /* assertion: check whether it has a content saying "Success!" */
  });
});
I wanted to make this explicit distinction between "commands" and "assertions" (the same way Cypress documentation does it) to highlight what is the main intuition behind writing Cypress tests (and any other UI tests really): first we select an element and then we either run an action on it or we check whether it passes certain conditions.
What's really worth pointing out in this example is the last line:
(...).should('contain', 'Success!')Notice that I didn't have to specify what kind of content Cypress is supposed to expect, I just informed it that it will contain the string "Success!". The people behind Cypress are aware of what chore testing is for most of us, so you can expect a lot of KISSes of encouragement from them.
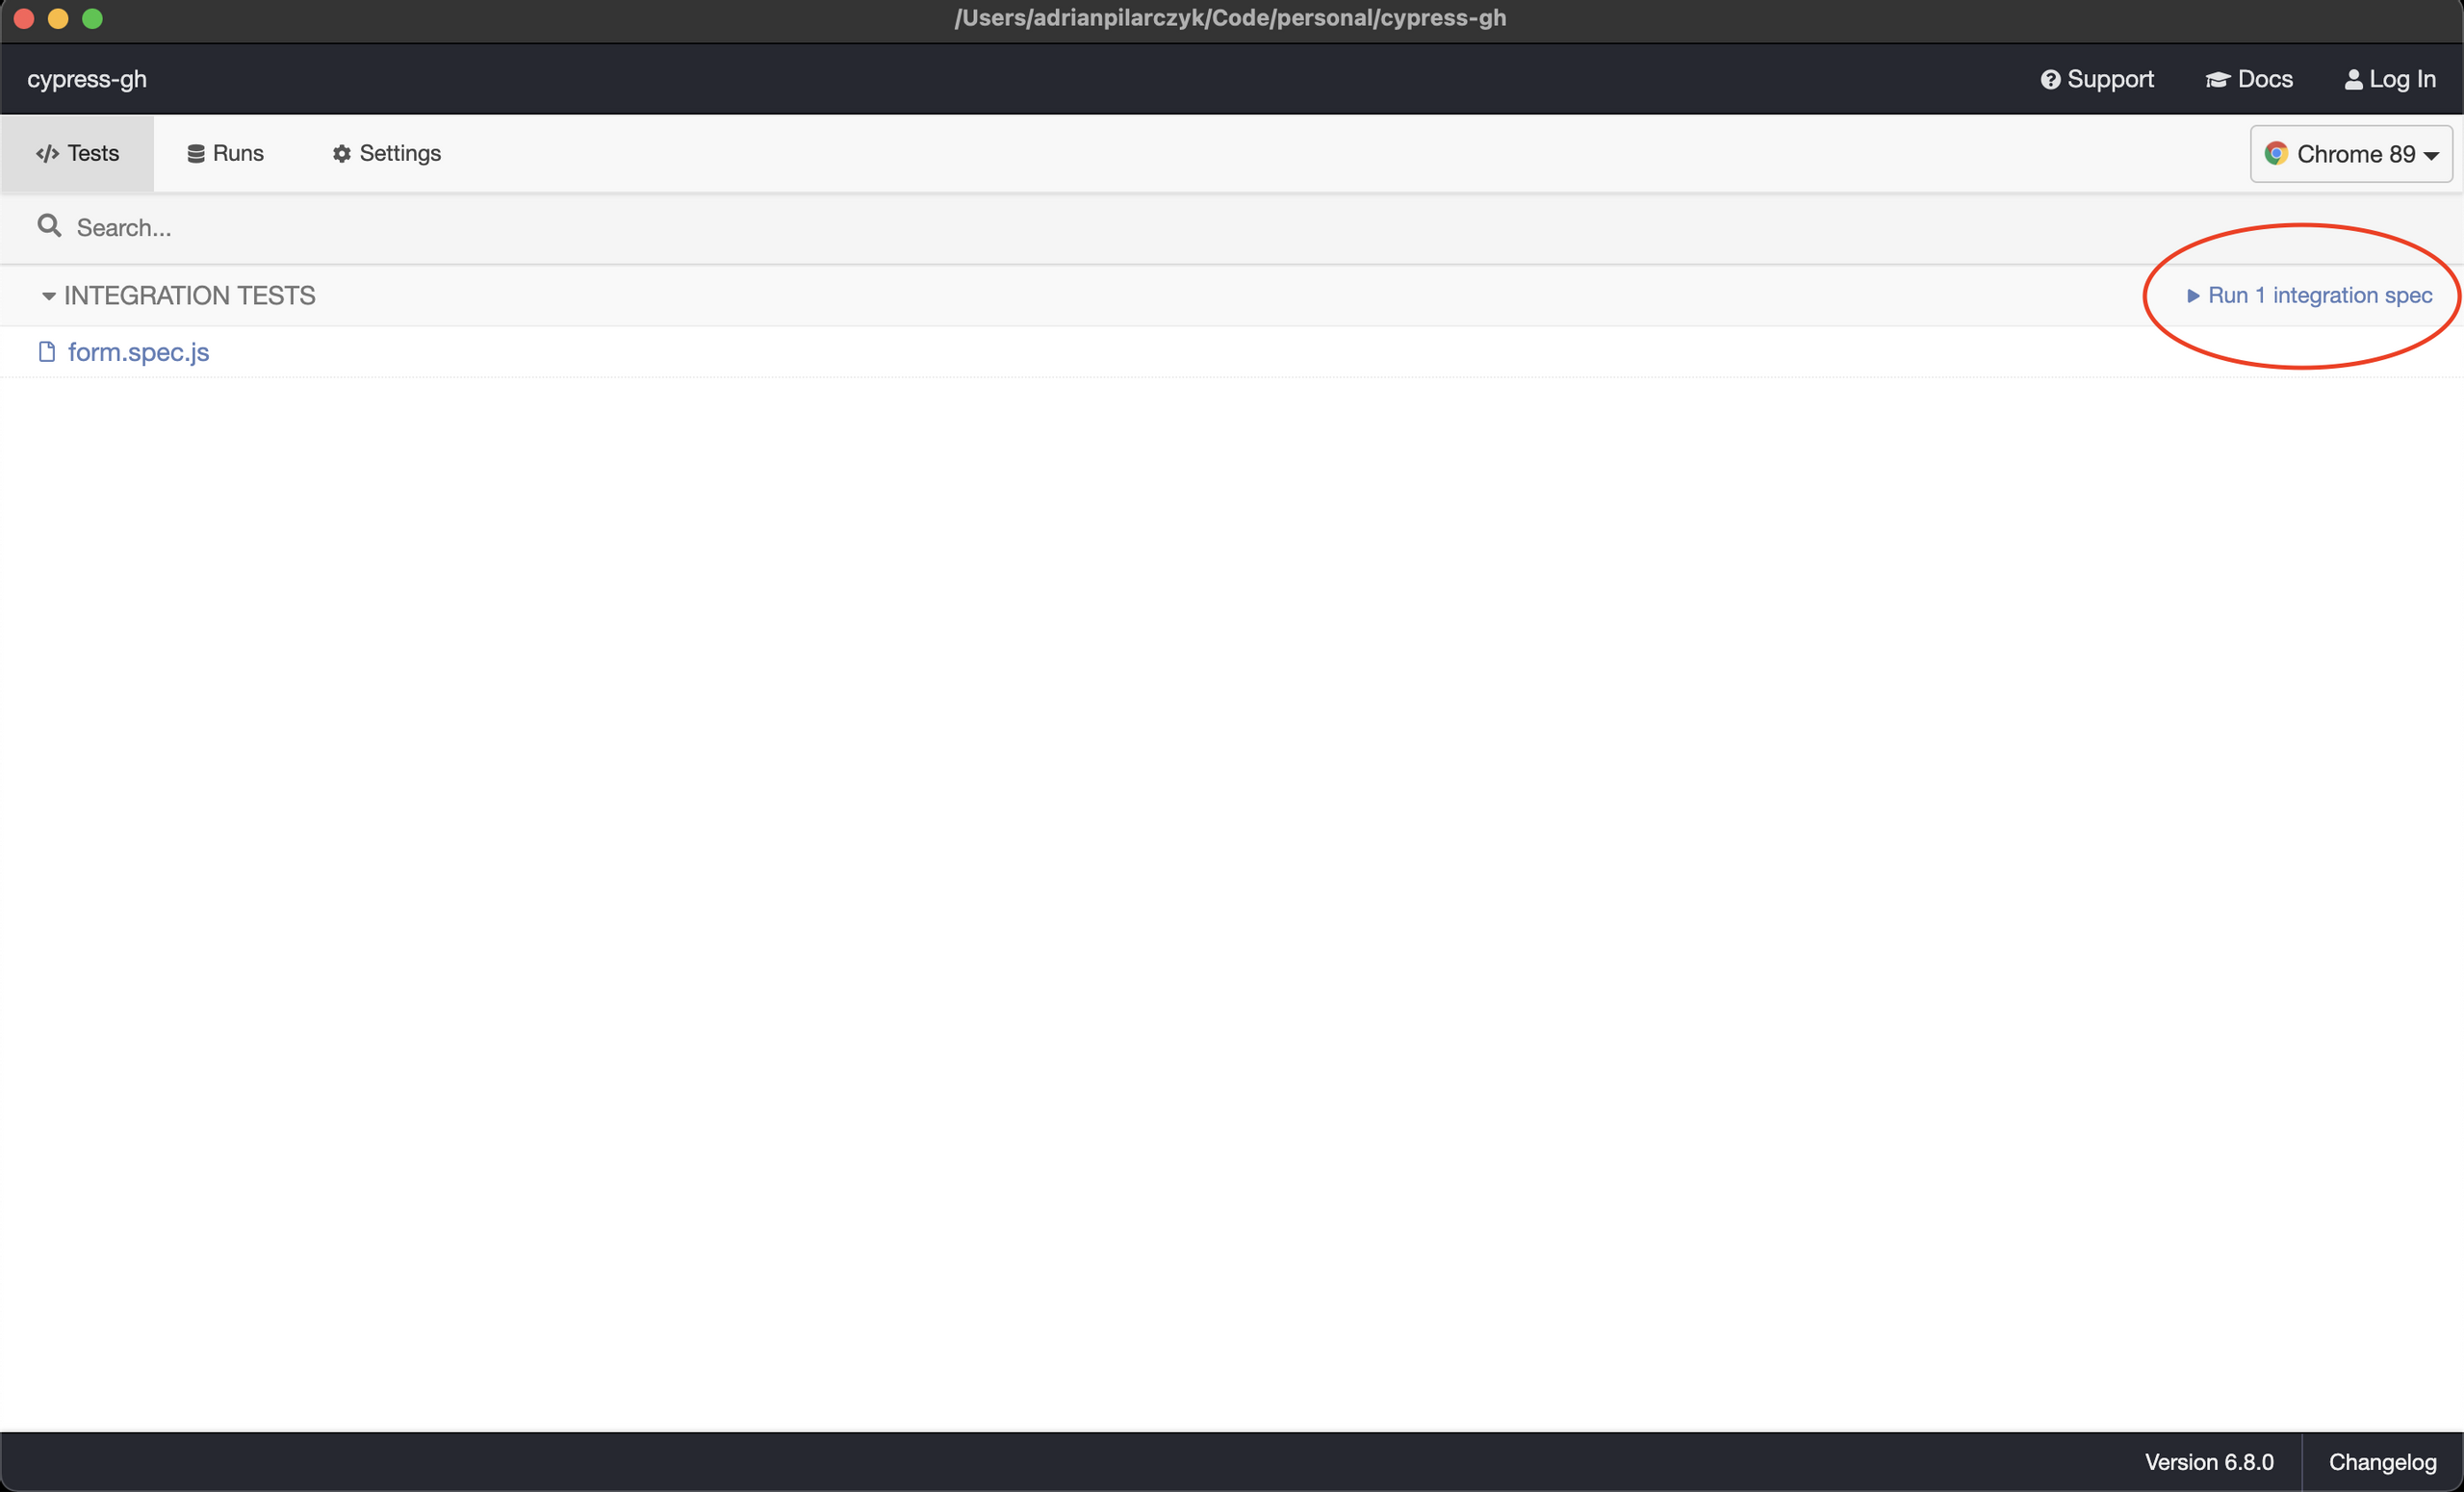
Right away, our test should land in the Cypress GUI. Let's run it there:
If you are lucky, this is what you should see:
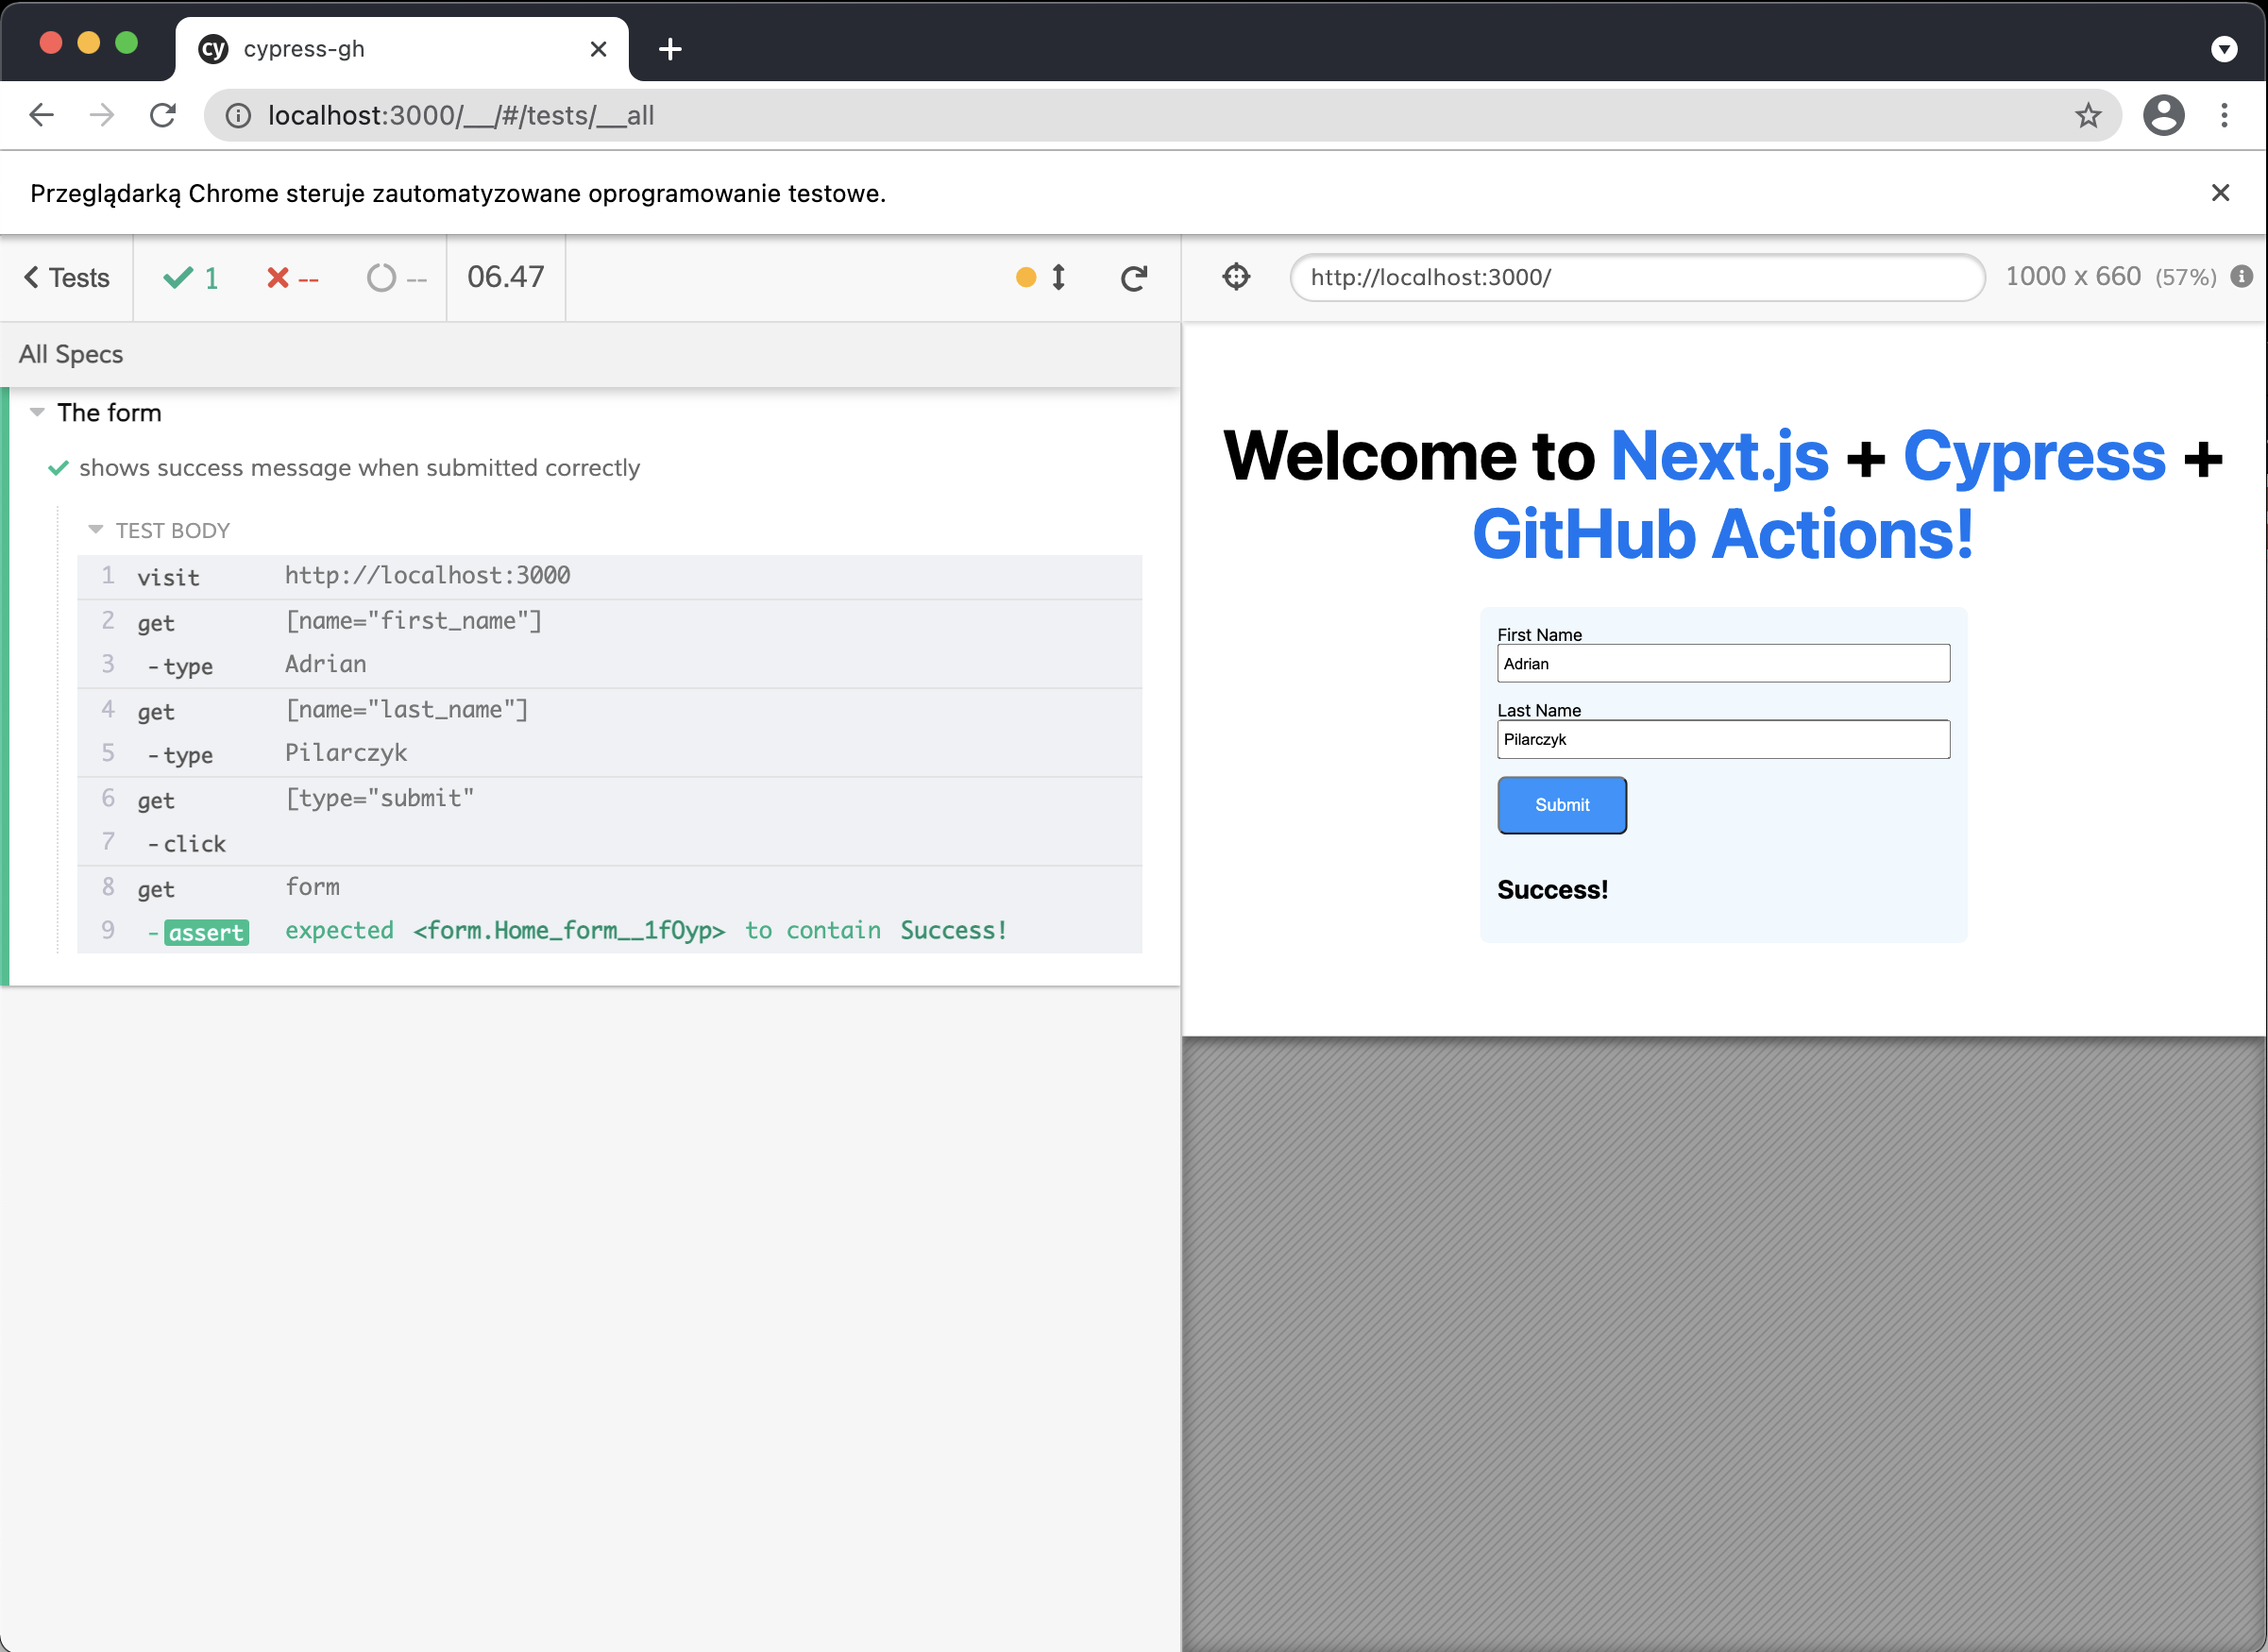
In the left column, Cypress gives us a rundown of all of the actions it performed for us. We also see the result of our assertion, which - and I hope you will see that often - in this case, is a success.
In this simple test, we unconsciously made a certain E2E testing design decision that Cypress dedicated an entire article to: we decided to send a request to an actual endpoint. Any time the results of our tests actually reach the database, we get ourselves a whole new layer to maintain. Do we clean the database up after we run the tests? Do we do it on production? Or do we set up a special staging environment for it? 🤯
On the other hand: this is as real-world as it gets, this is the exact experience the user can expect, which is the motivation behind E2E testing. We don't need to worry about mocking the server responses (which can also change over time), but besides babysitting the data we also have to be aware of the time it takes to finish the request. As we all know, the oldest saying in the world is "time is money", so I assume we may want to be able to address it in our tests.
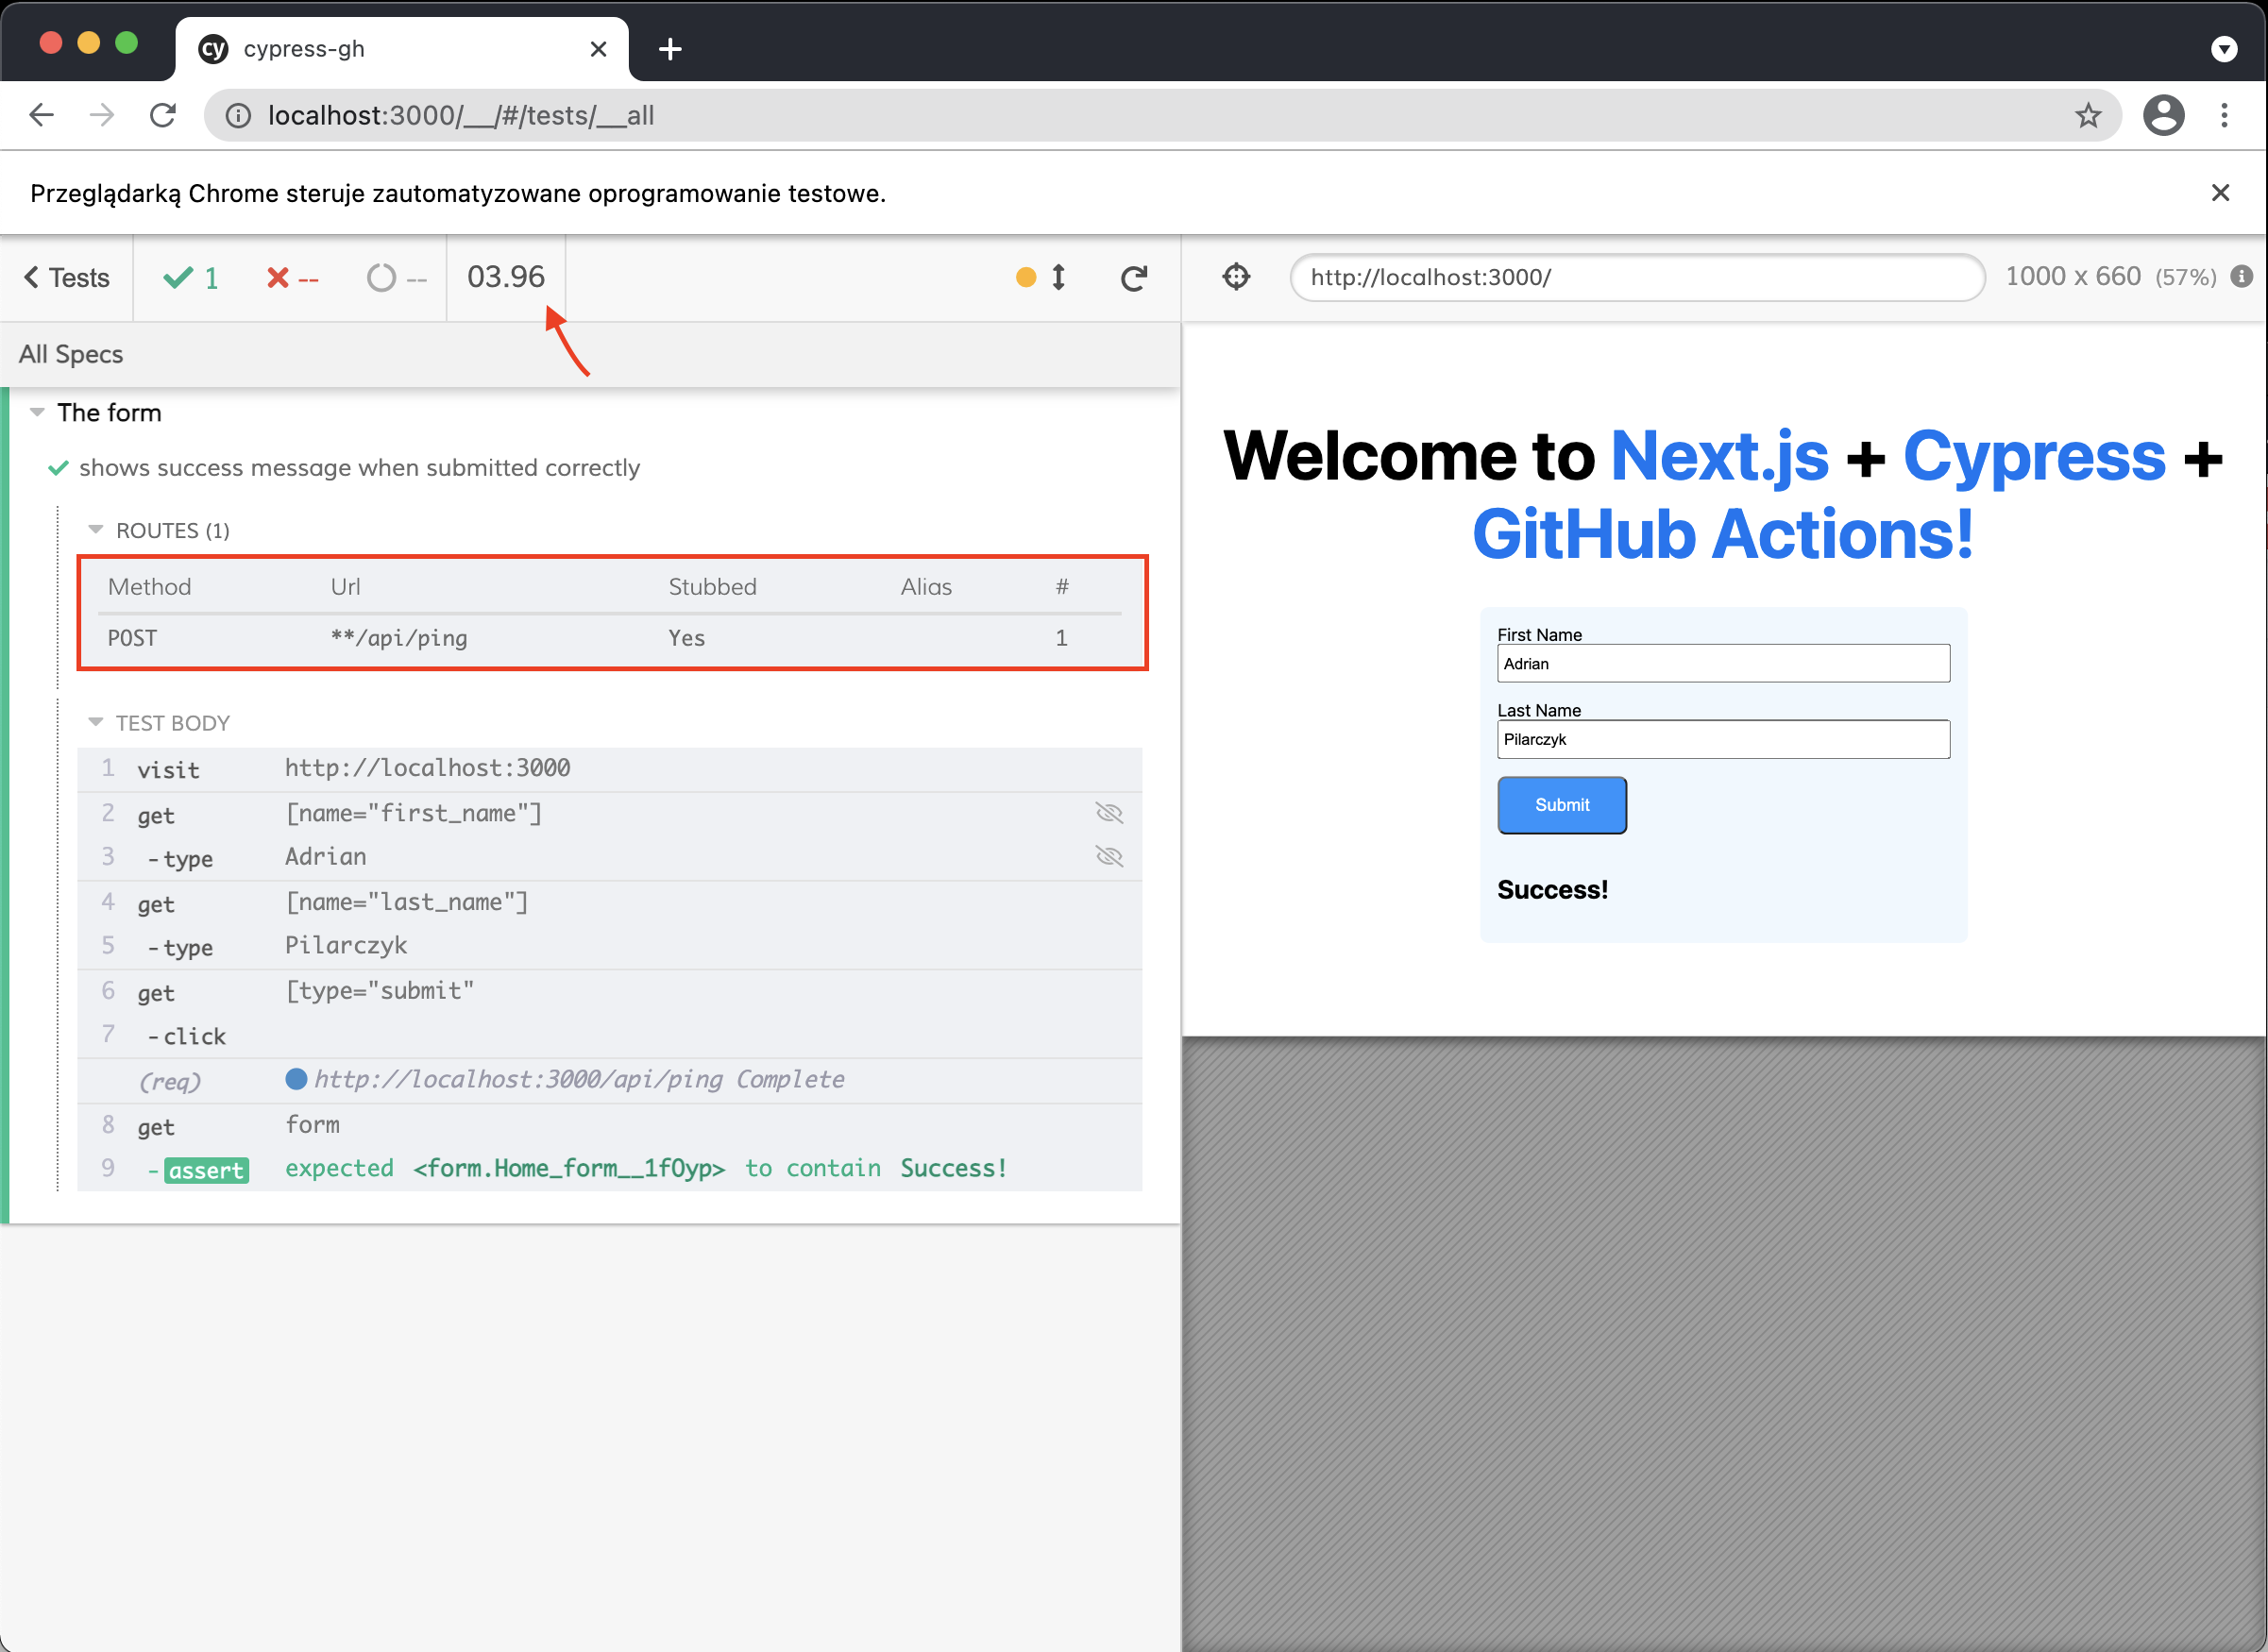
Luckily, Cypress provides us with a method called intercept that does exactly that - it catches the requests that we try to send and return a response we specify in our test. In other words, it allows us to mock network requests. With this modest addition...
describe('The form', () => {
  it('shows success message when submitted correctly', () => {
    cy.intercept('POST', '**/api/ping', {
      statusCode: 200,
      body: {},
    })

    cy.visit('http://localhost:3000')
    cy.get('[name="first_name"]').type('Adrian')
    cy.get('[name="last_name"]').type('Pilarczyk')
    cy.get('[type="submit"').click()
    cy.get('form').should('contain', 'Success!')
  })
})
...we can expect our test to take slightly less time:
4. Integrating Cypress into GitHub
Now that we have our first test, it's time to move it from our local environment to an actual CI/CD. This starts with integrating Cypress into our repository which is enabled by a service called Cypress Dashboard. The entire process is perfectly described in the Cypress documentation.
Once we are authorized, we must initialize our project:
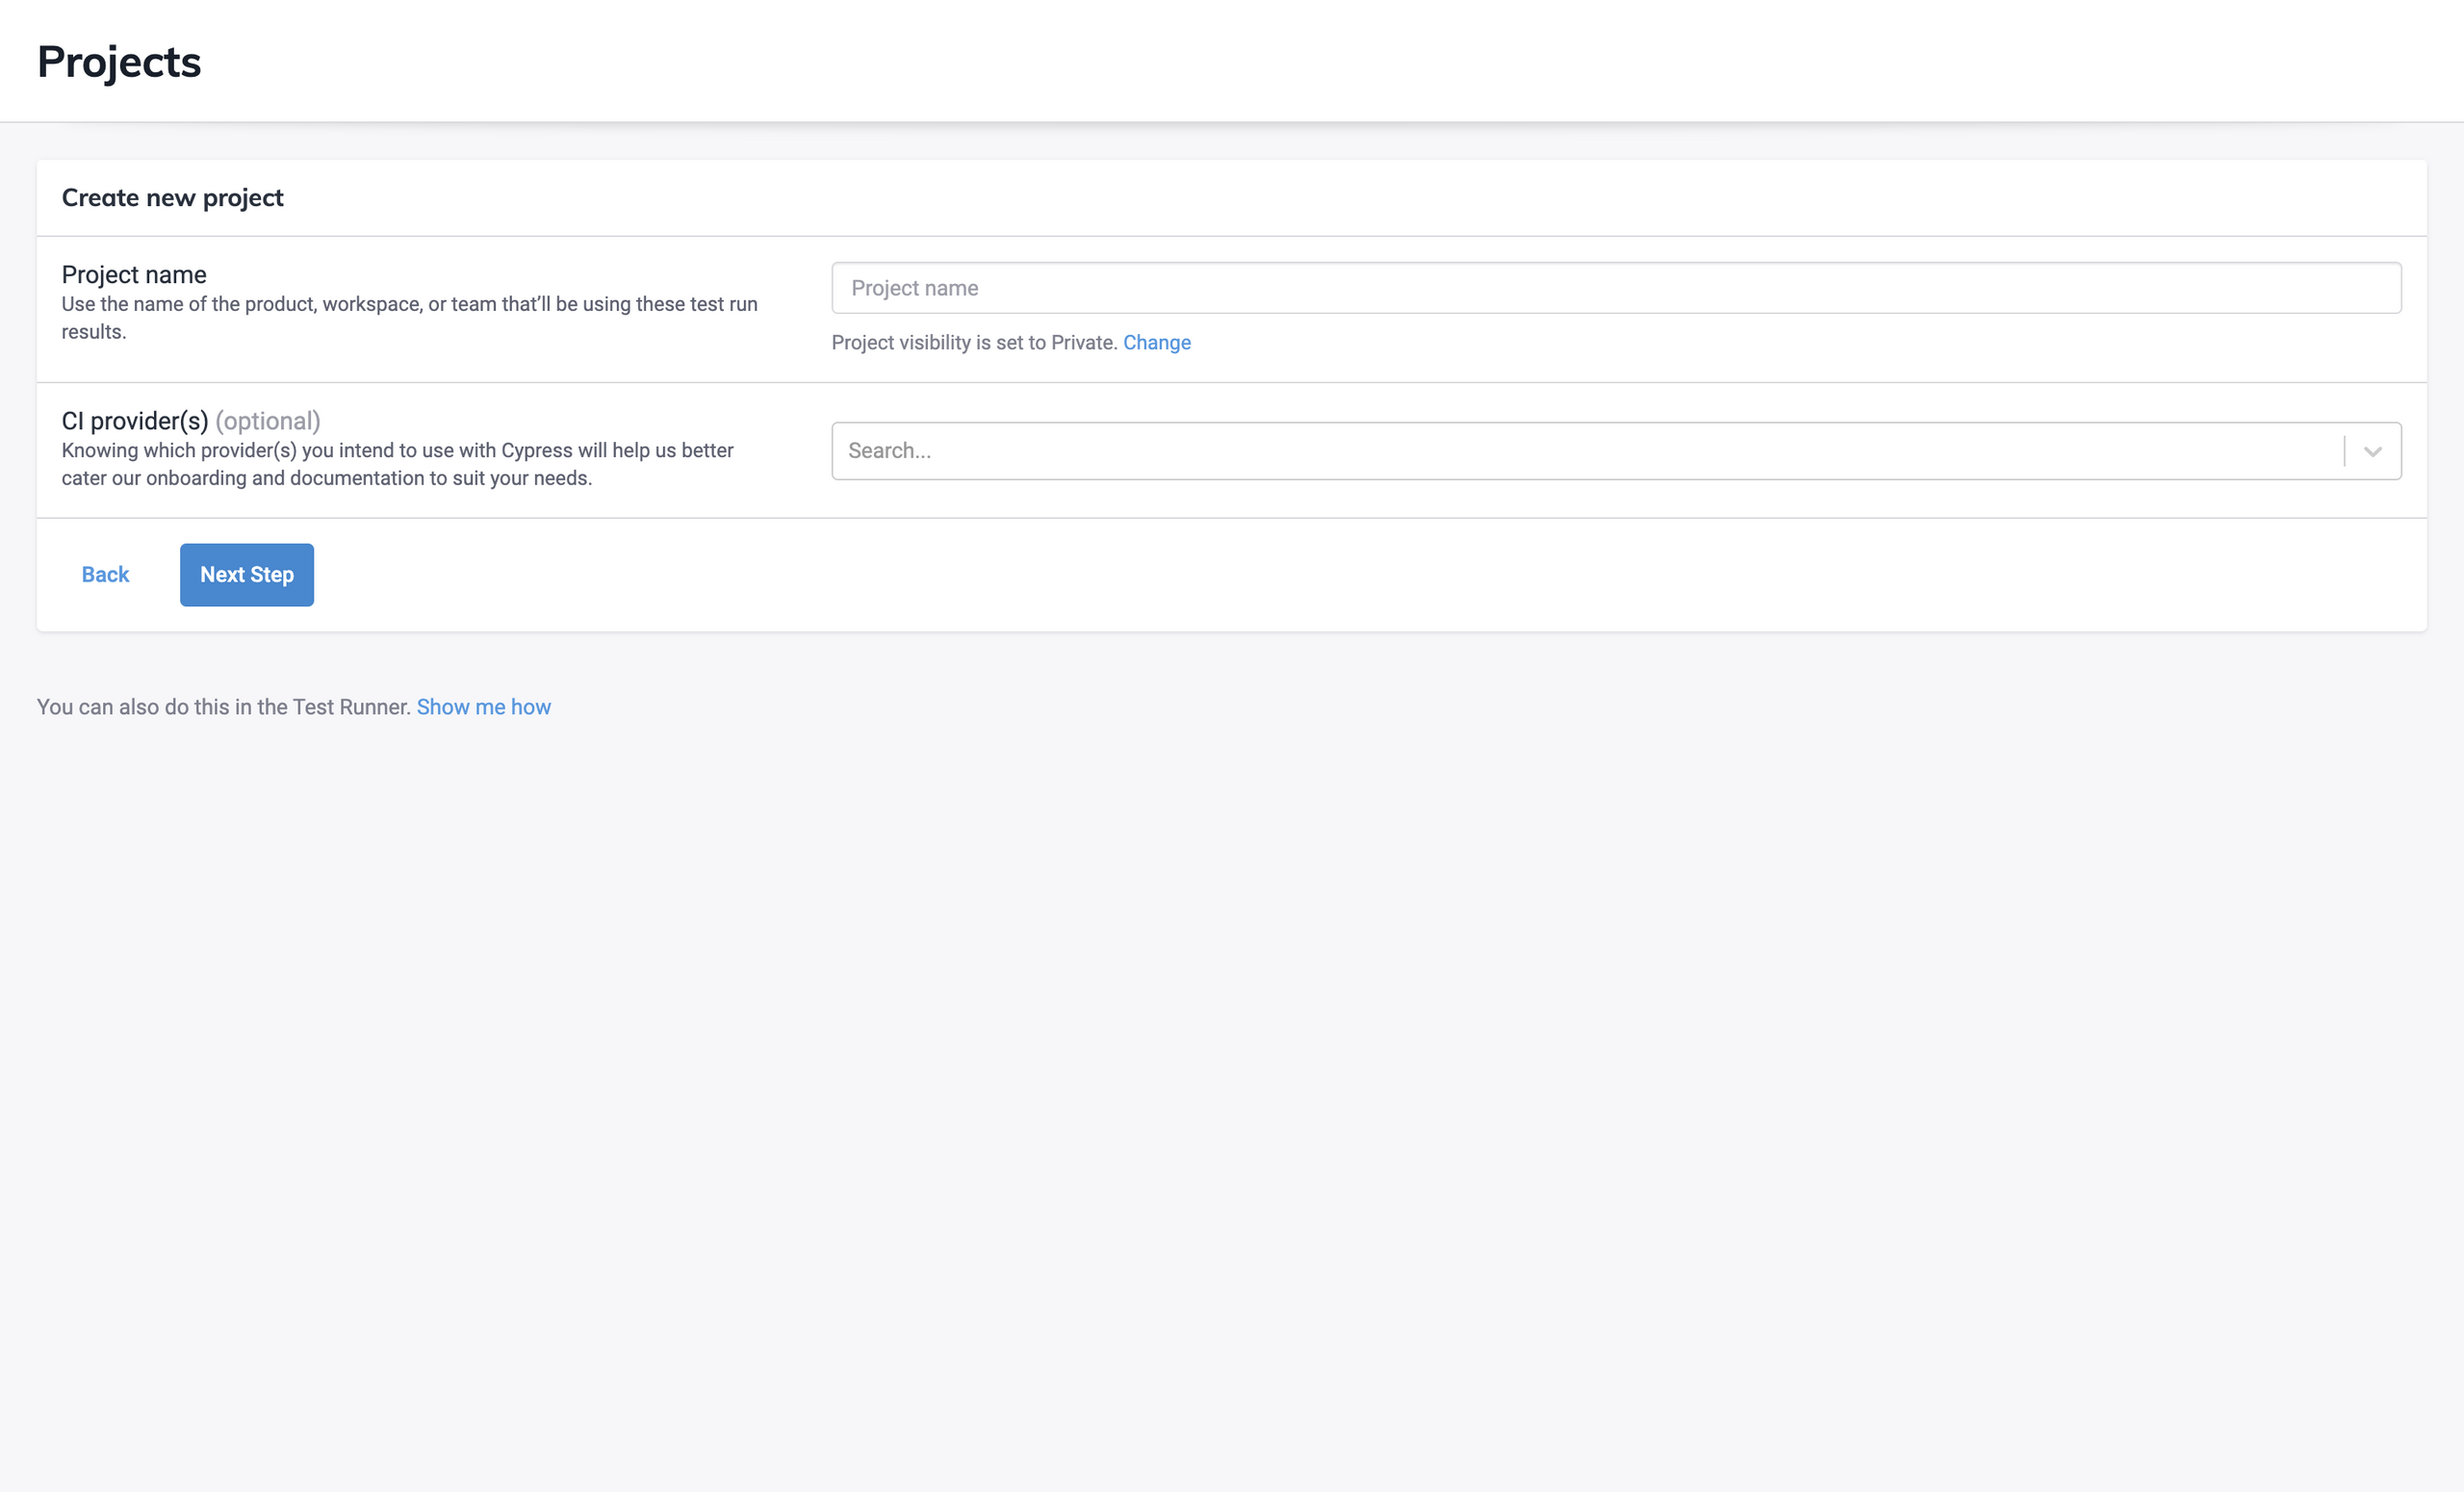
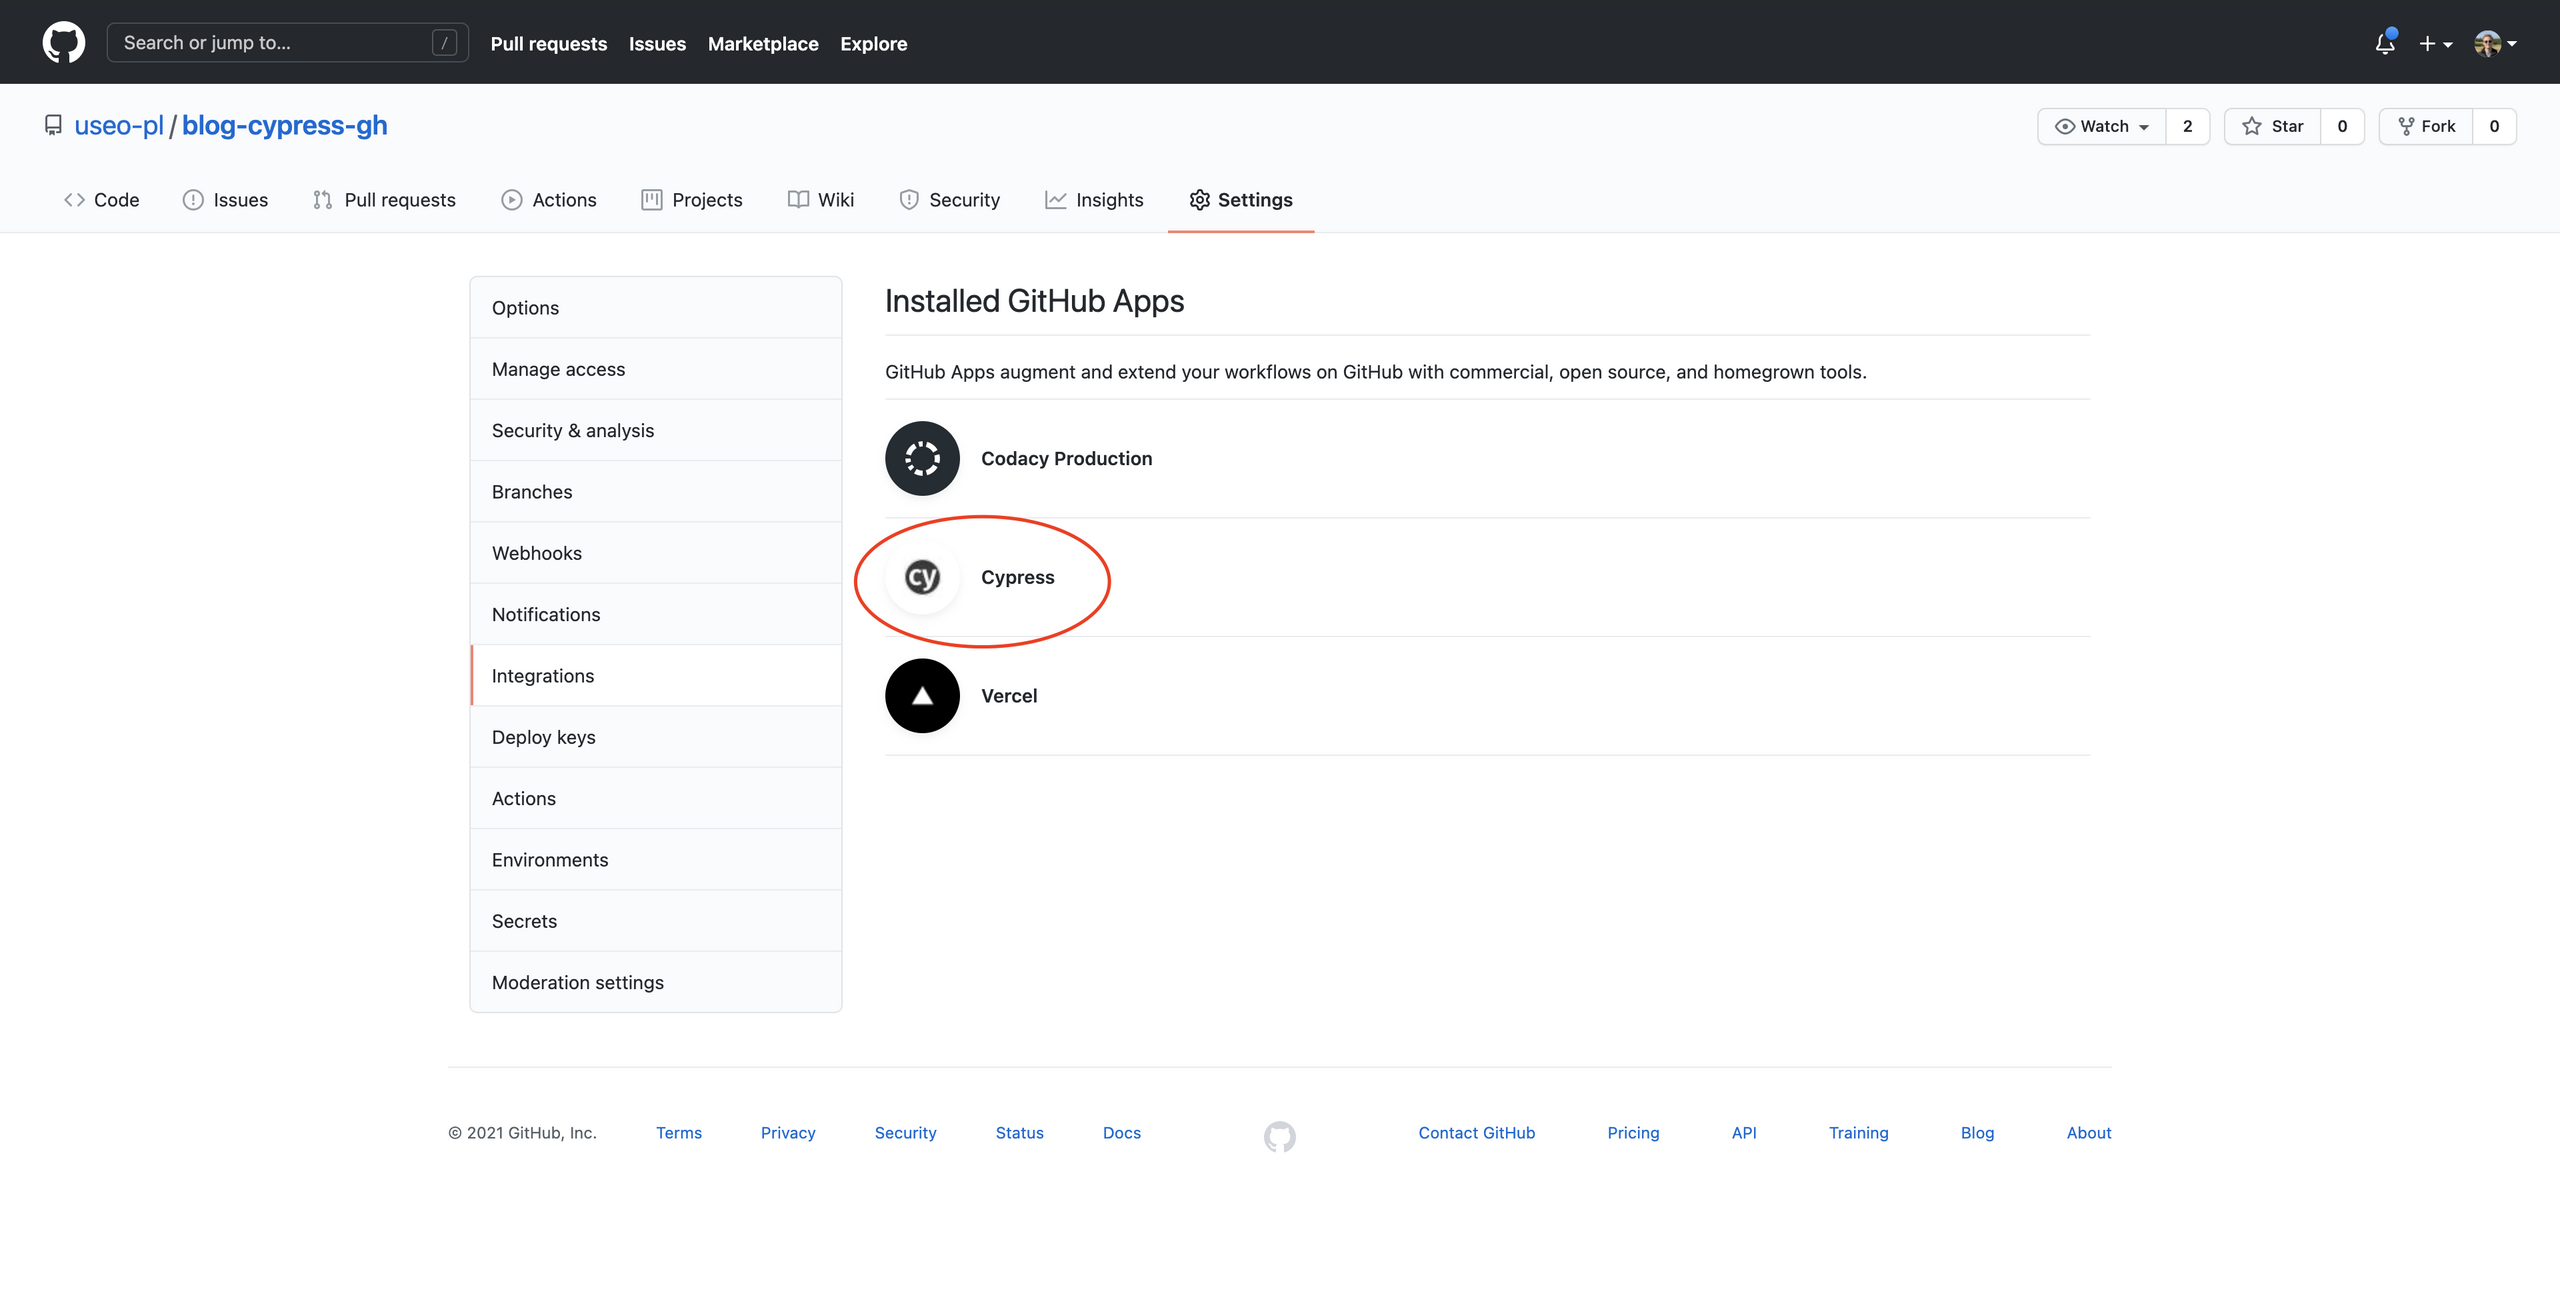
Following the instructions from Cypress Dashboard, we add the projectId to cypress.json that Cypress should have created for us on its first run. The entire process, if executed correctly, should result in the presence of Cypress integration in the GitHub "Integrations" section in the repository settings.
This is where the final and the most fun part begins.
5. Running Cypress via GitHub Actions
GitHub Actions is an awesome automation pipeline that we will use to run our Cypress test suite on each Pull Request in our repository. We will do so by providing it with a .yml file that will include all of the instructions needed for our tests to run:
# .github/workflows/e2e.yml

name: e2e
on: [pull_request]
jobs:
  cypress-run:
    name: Cypress run
    runs-on: ubuntu-16.04
    steps:
      - name: Checkout
        uses: actions/checkout@v2
      - name: Cypress run
        uses: cypress-io/github-action@v2
        with:
          build: npm run build
          start: npm run start
          wait-on: http://localhost:3000
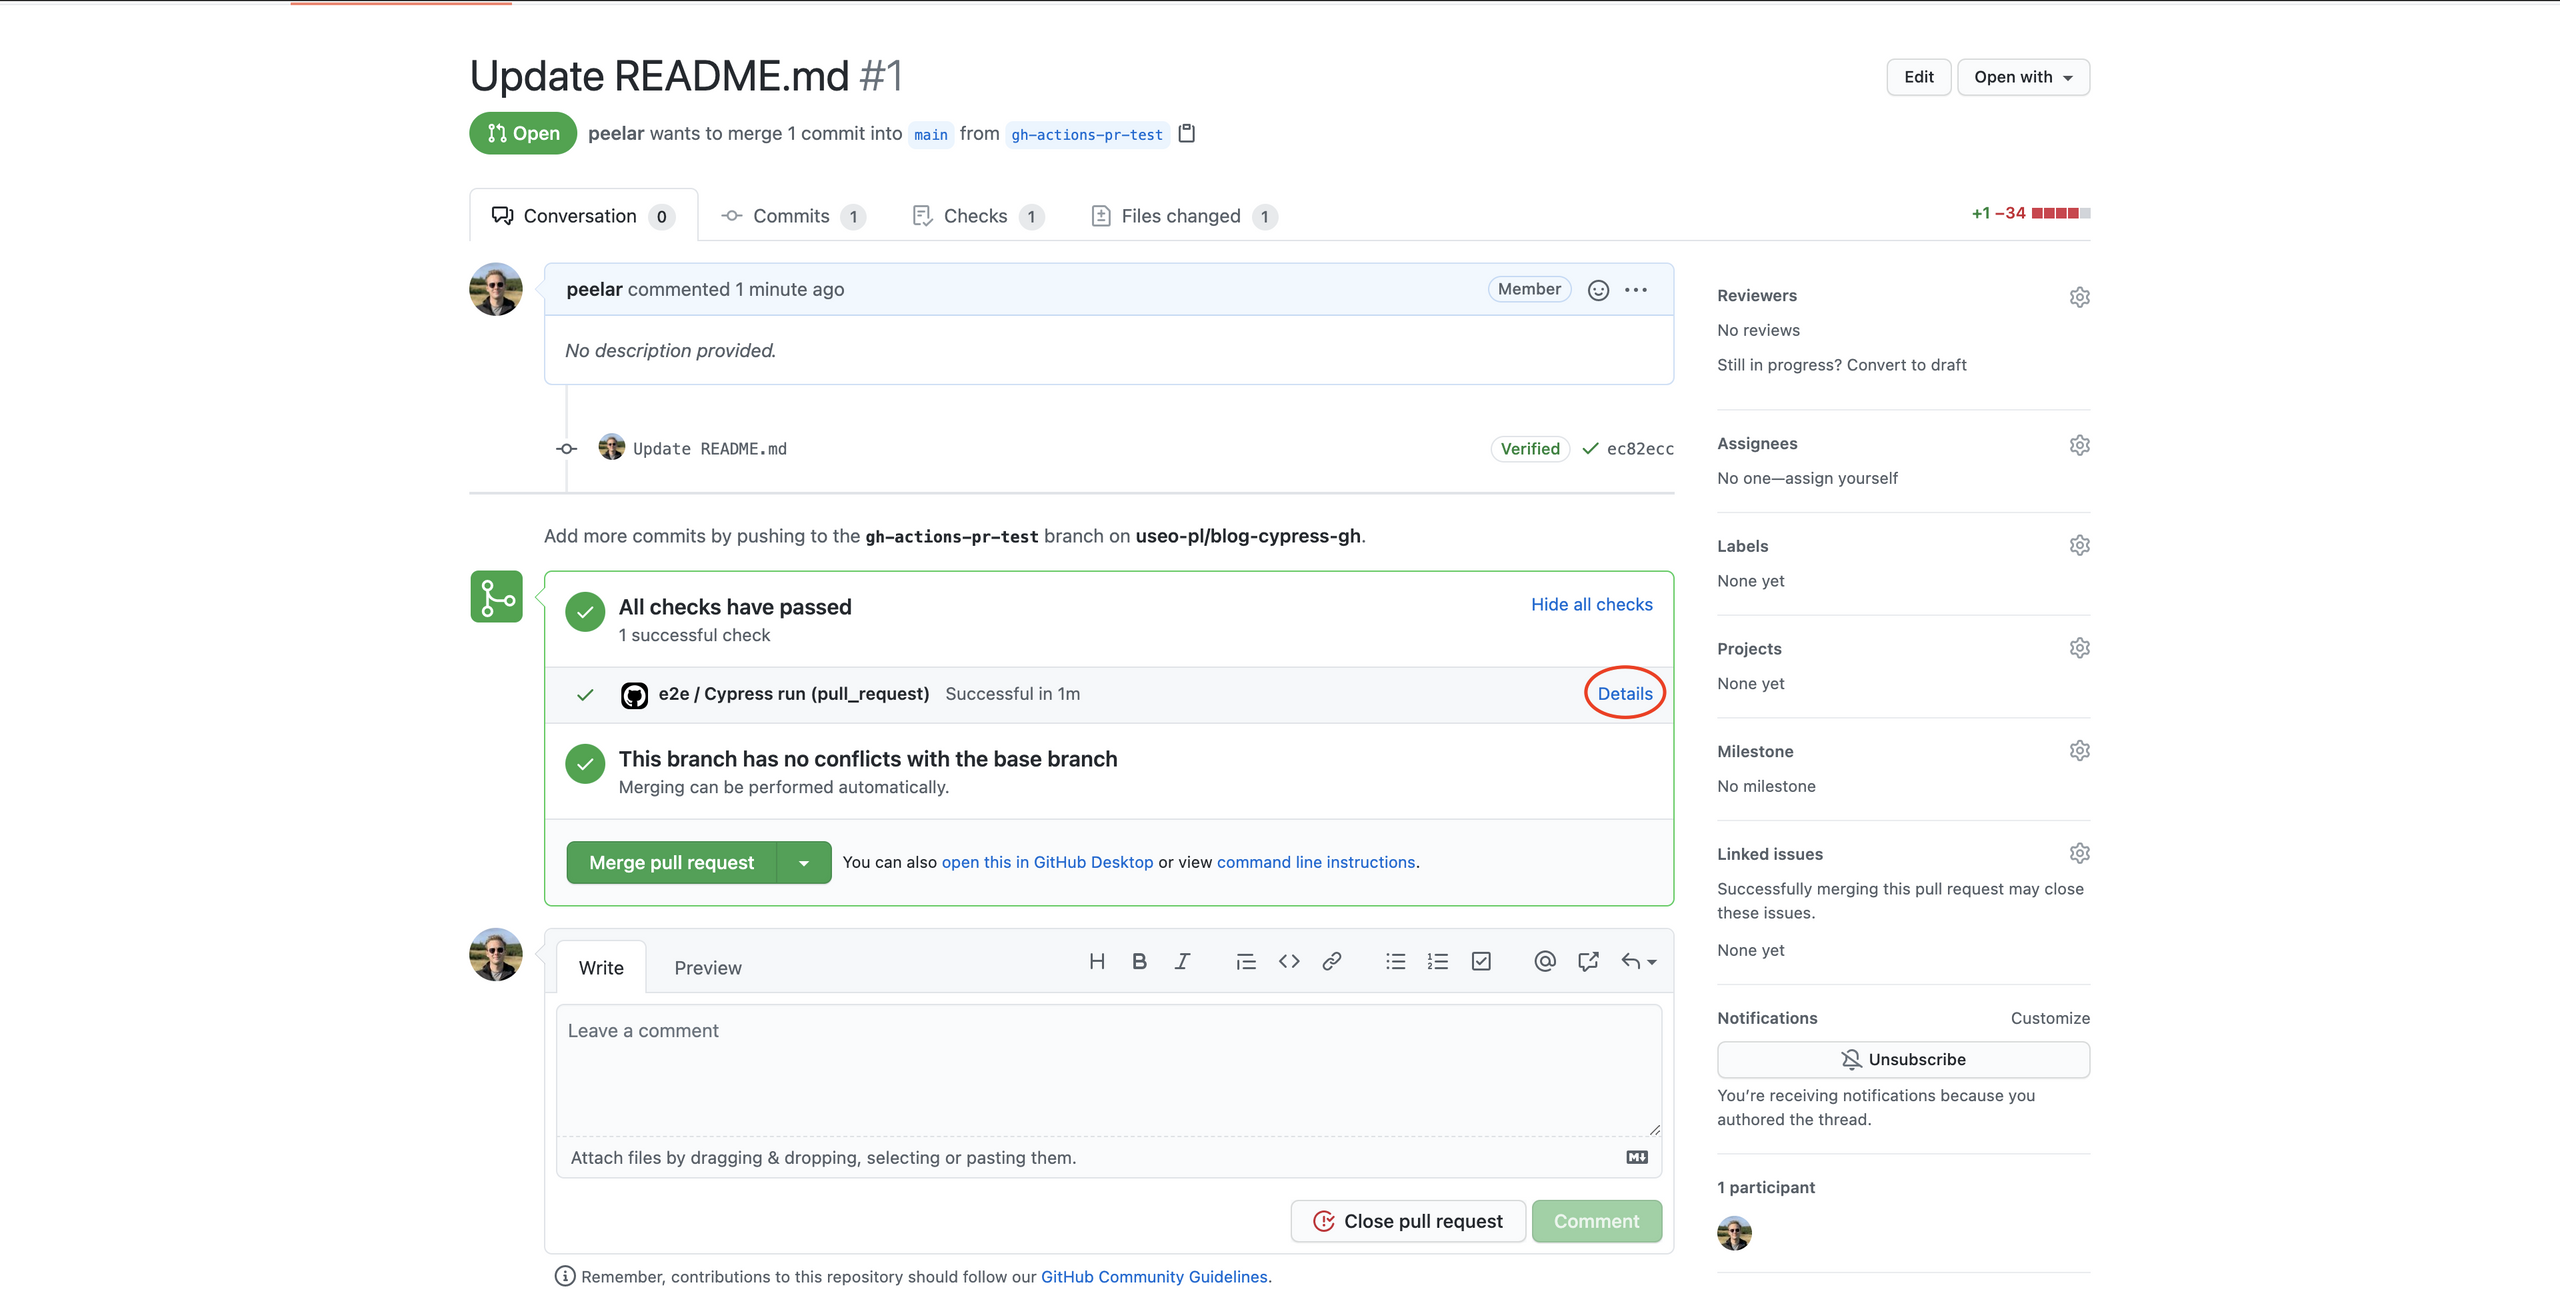
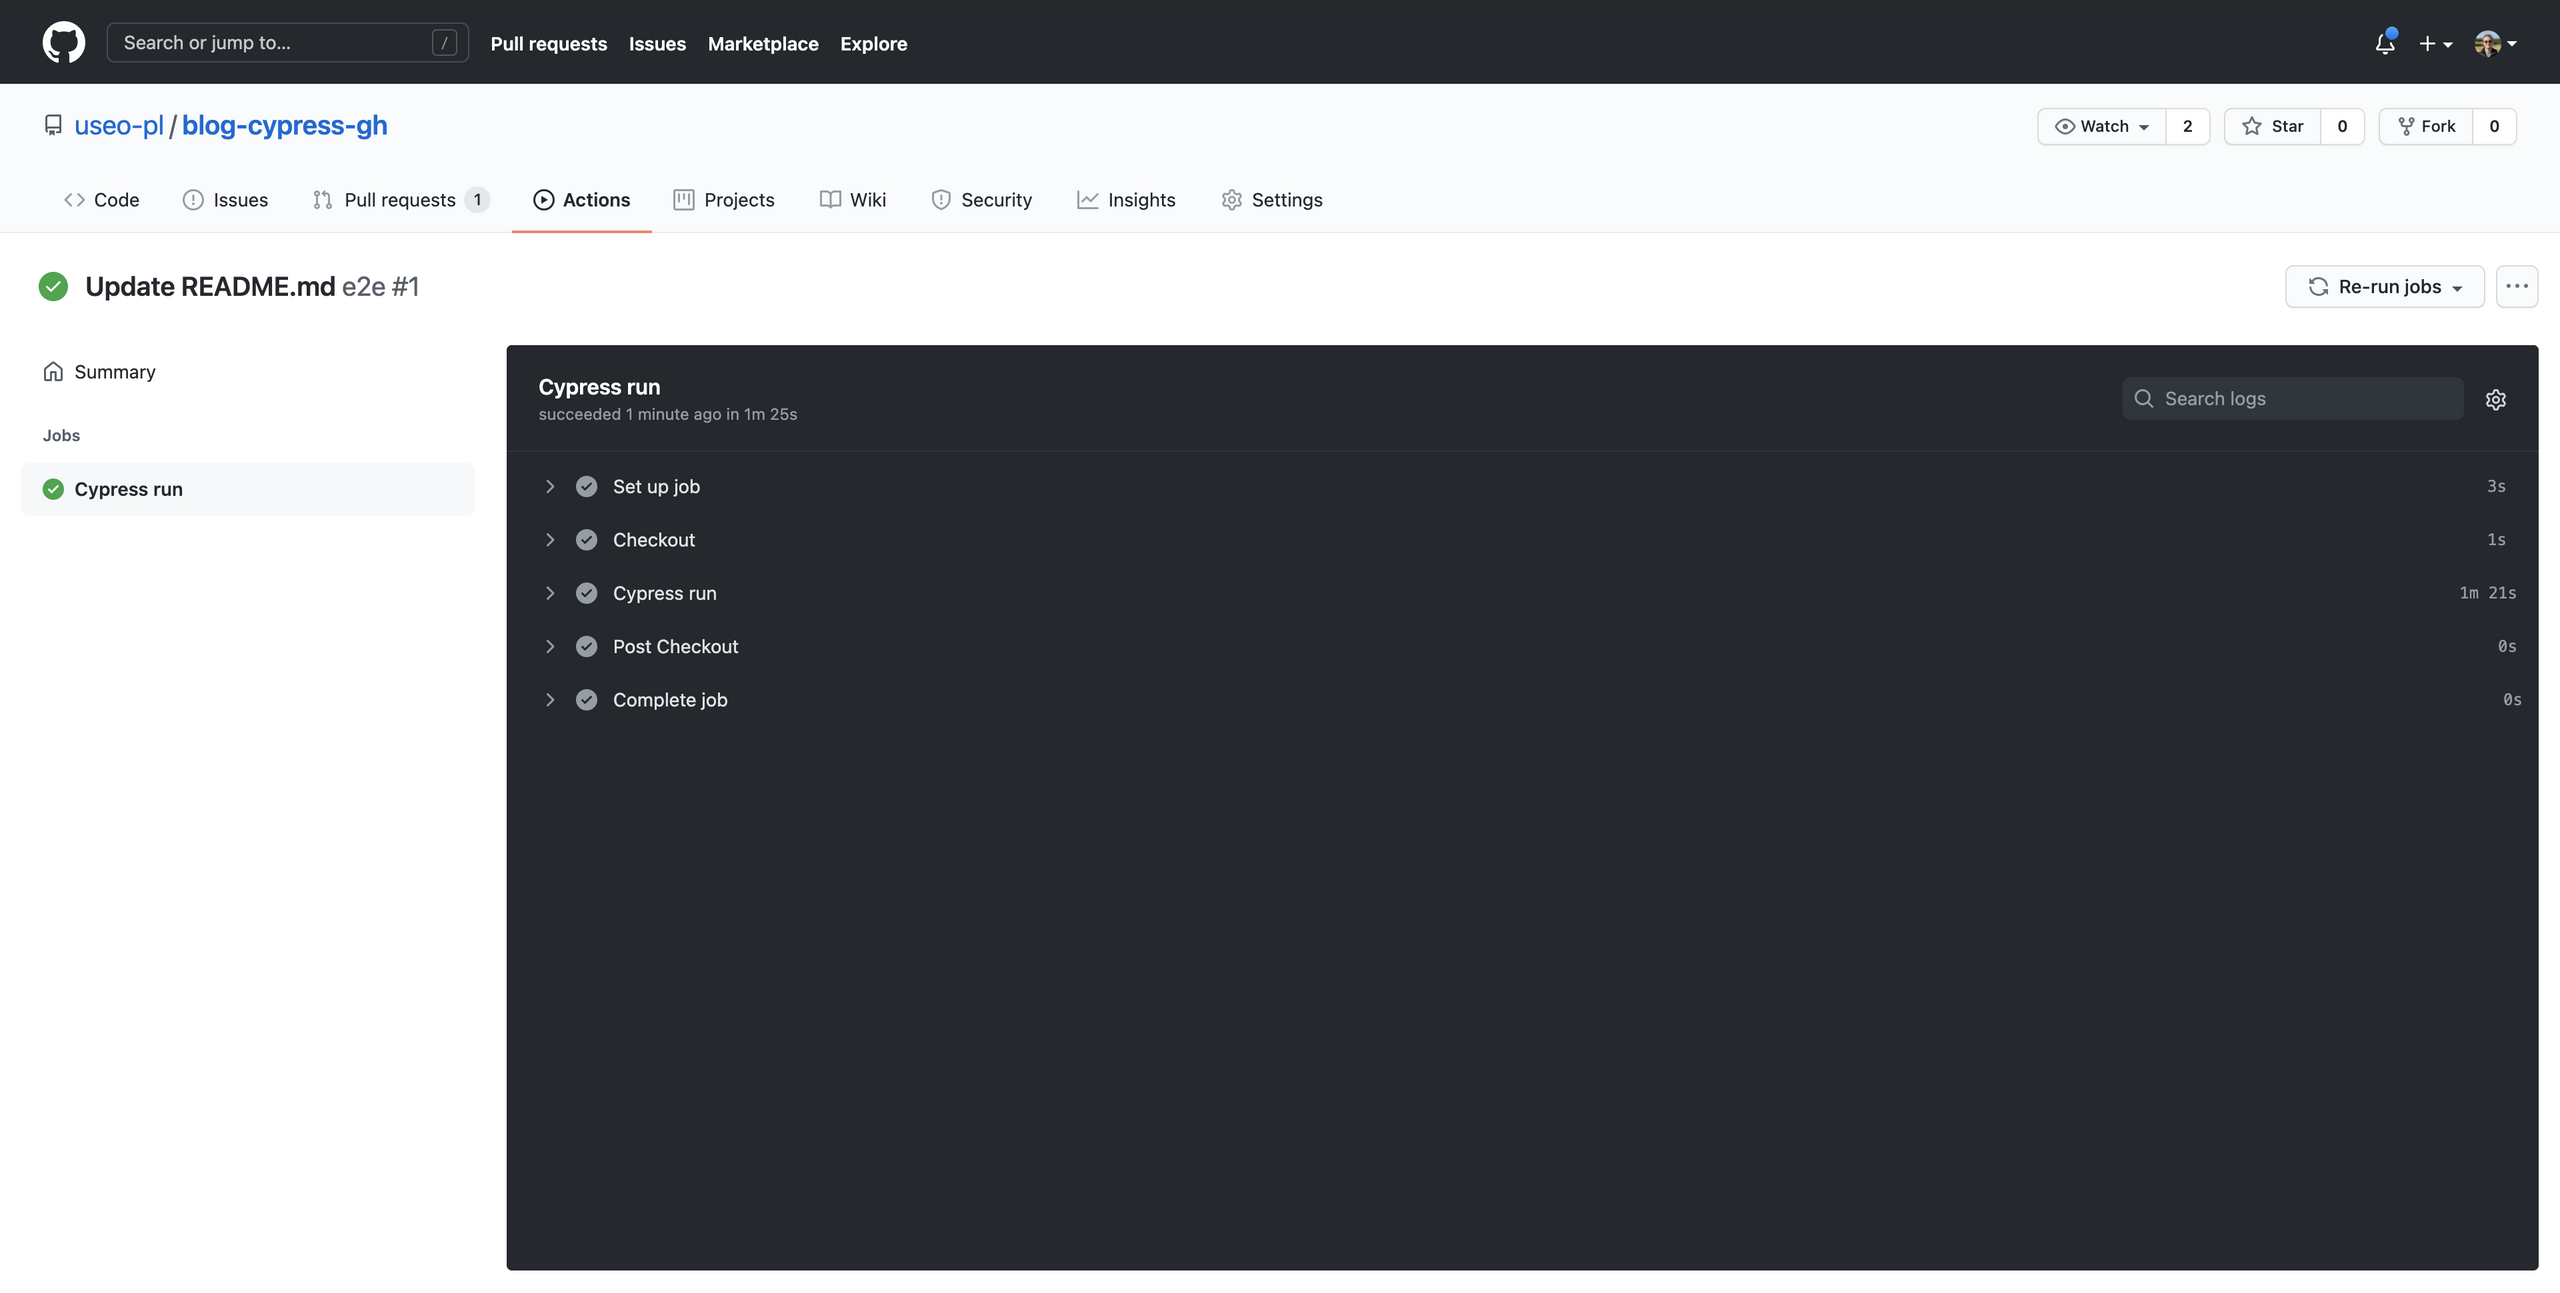
Just a moment ago you were about to quit because you never planned on becoming a dev-ops, right? The fear of that had been a show-stopper for my usage of Cypress in a commercial environment for far too long. However, pushing those few lines, by courtesy of GitHub Actions and Cypress (and their predefined routines called cypress-io/github-action), made my jaw drop the first time I saw it in action:
You thought that was cool? How would you call adding a recording of our tests with just 4 lines of config, then?
# .github/workflows/e2e.yml

name: e2e
on: [pull_request]
jobs:
  cypress-run:
    name: Cypress run
    runs-on: ubuntu-16.04
    steps:
      - name: Checkout
        uses: actions/checkout@v2
      - name: Cypress run
        uses: cypress-io/github-action@v2
        with:
          build: npm run build
          start: npm run start
          wait-on: http://localhost:3000
      - uses: actions/upload-artifact@v1
        if: always() # / if: failure() <- more suitable for production
        with:
          name: cypress-videos
          path: cypress/videos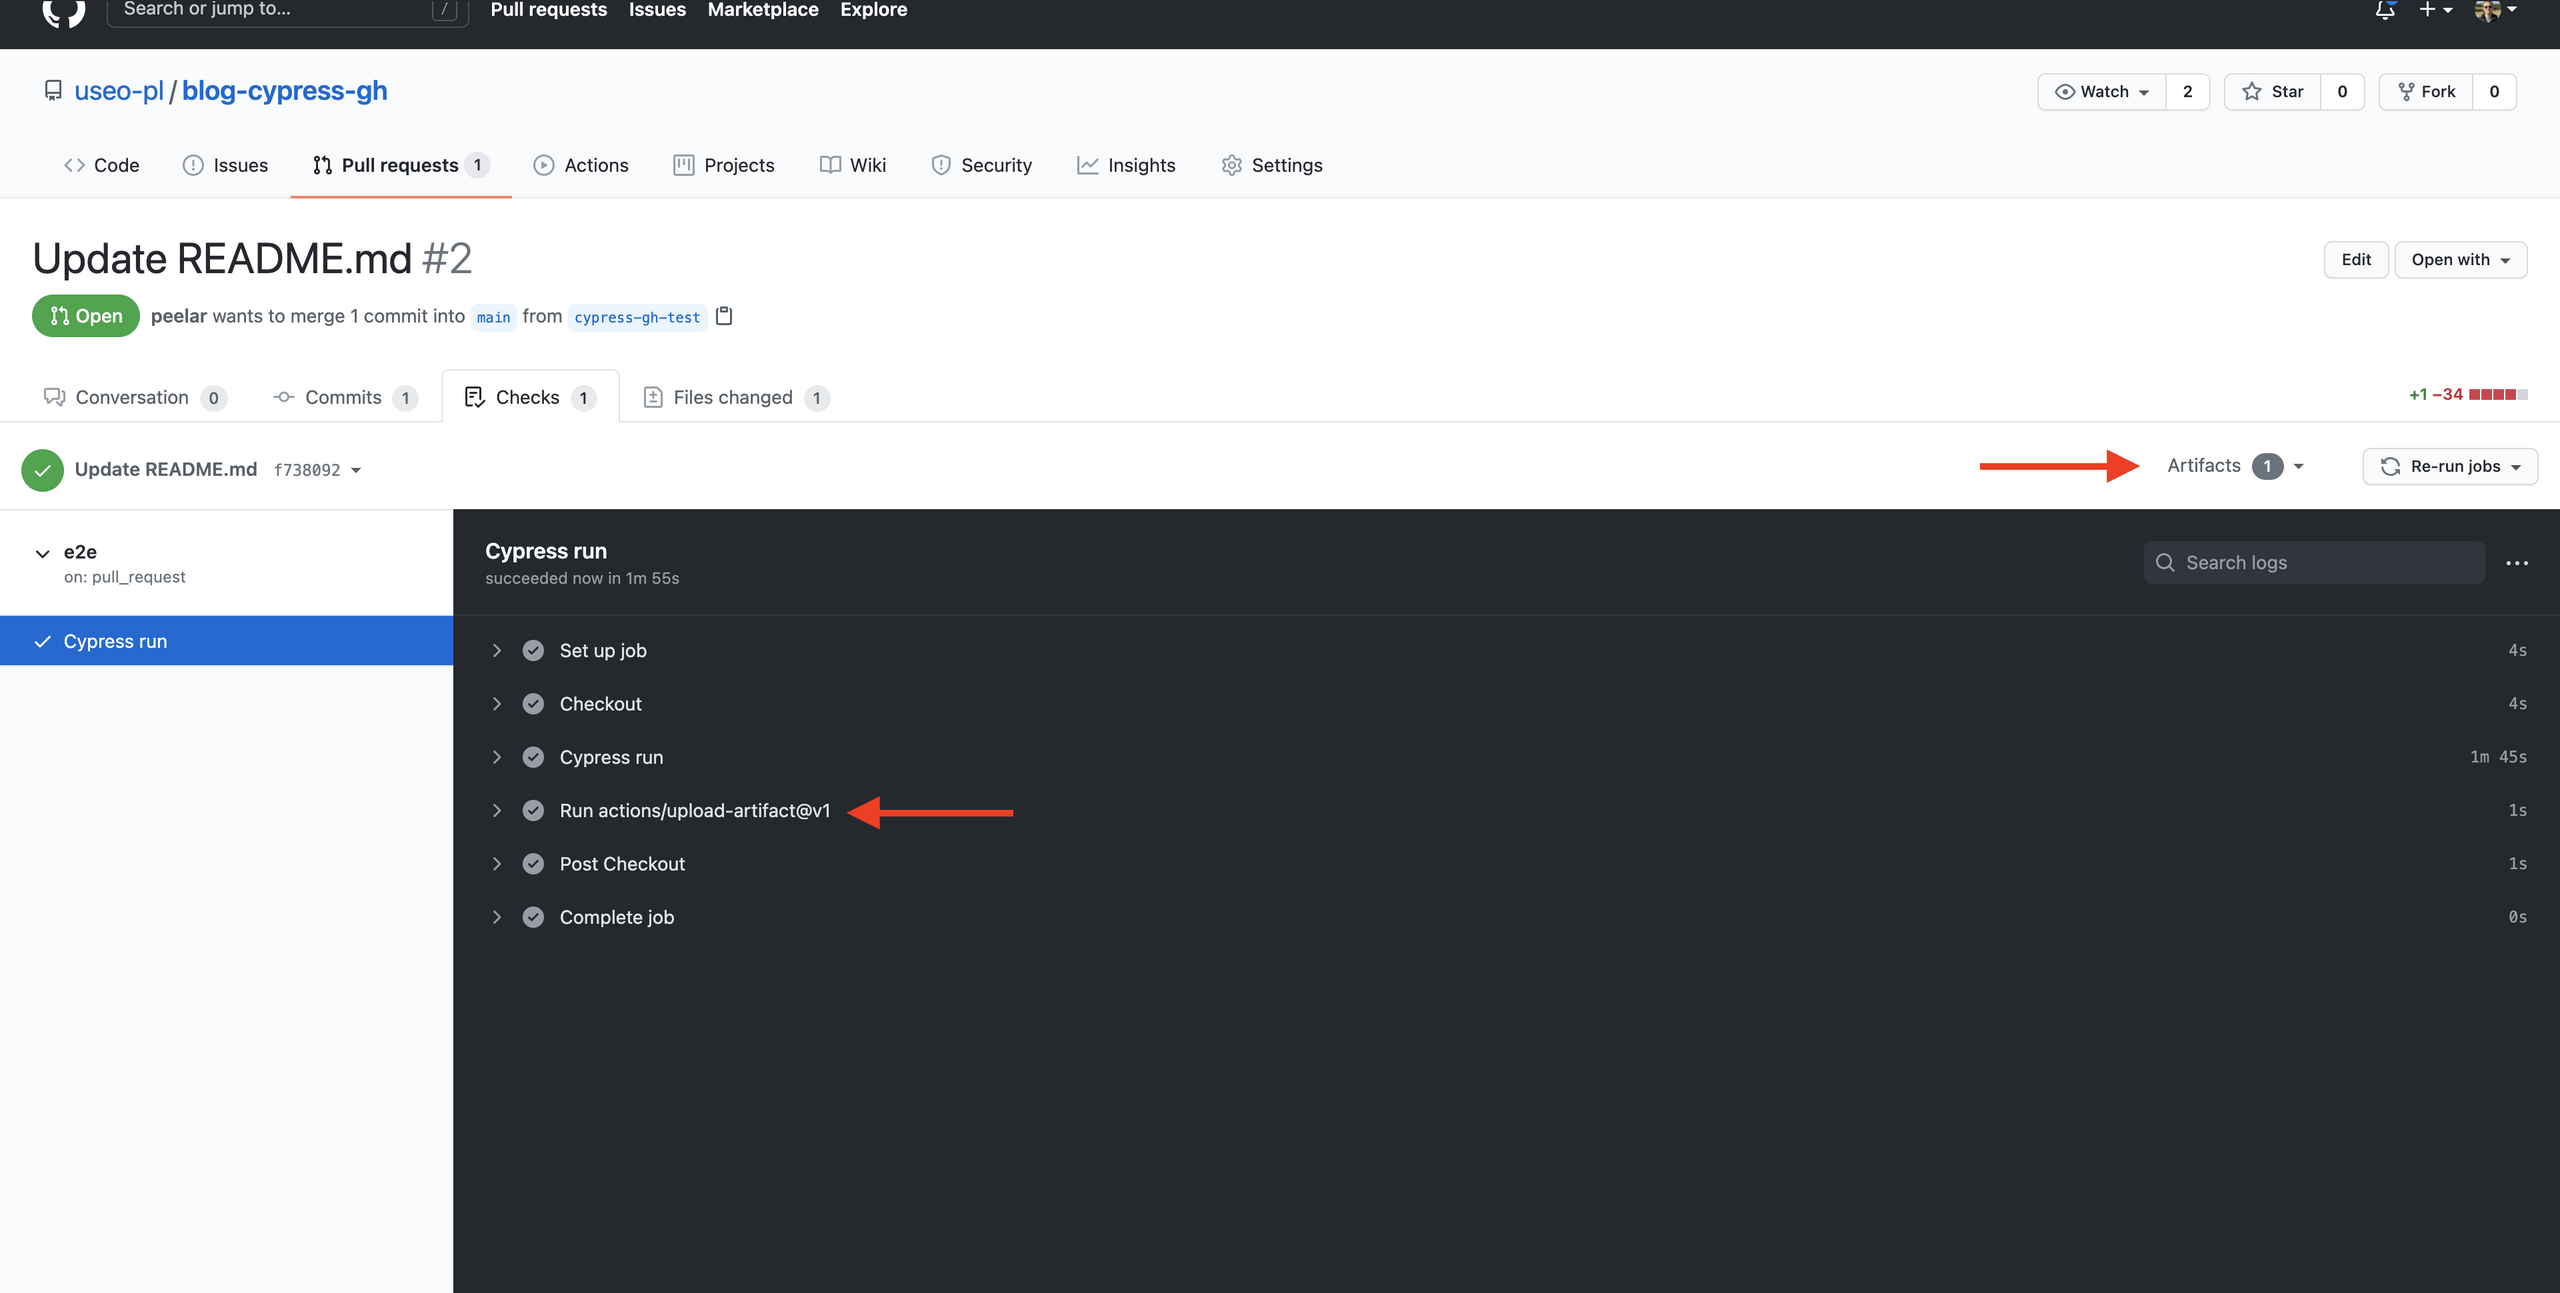
The possibilites don't end here. Cypress plugin for GitHub Actions allows you to do all sorts of crazy things like: specyfing different browsers, narrowing down which tests to run or tests parallelization. Combine it with a knowledge of GitHub Actions events and you can get yourself a tailored E2E testing workflow.
Aaaaand that's a wrap! If that doesn't make you like writing some tests, there is no hope for you 💀.

